Canvas setup for pixel art in Procreate
Getting started with pixel art (especially in a program that wasn’t designed for it) can feel discouraging at first and might open a bottomless pit of endless questions.
But don’t stress about it. Here are my go-to settings, I use when creating a new pixel project.
🔖 Quick links
Why is pixel art so ridiculously small 🤔
Since I’m used to working on fairly large canvas sizes in Procreate (about 2000-3000 px), I wanted to do the same when I started doing pixel art. But that didn’t really work out, and here’s why:
Technically speaking, pixel art can be any size. A “dot” is just a 1×1 px square, and of course, you could simply scale it by creating a brush that’s e.g. 10 times bigger but here’s the catch.
1. It’s just annoying
Since 1px is the smallest unit you can work on, each time you draw a pixel, it automatically snaps to an invisible grid (even with no Drawing guide active). That’s so nice and simple.
If you go bigger in canvas size and drawing e.g. 10x10px squares (for one pixel/dot) they will overlap which makes it very hard because you can’t keep the pixel aesthetic consistent.
Therefore, start with a small canvas and scale your art in Procreate later 👉 check out my guide for quality scaling here.
2. Less (pixels) is more
I think we can both agree that we want to create pixel art primarily because of its distinctive character.
Especially when just starting out with pixel art, you tend to draw as if you were using a pencil. Because you want to make the most of the space you have, you might add more lines and details than necessary (is that’s why my apartment is so packed…). Don’t get me wrong, this is a style by itself but can look less like pixels and more like drawing after all.
But the bigger your project’s dimensions, the smaller your pixels appear and the less you can recognize the pixel art effect. When just starting, it can less overwhelming having a smaller canvas.
Set up your canvas 🖼️
Create a new canvas
In the gallery view, tap on + and the icon next to “New canvas”.
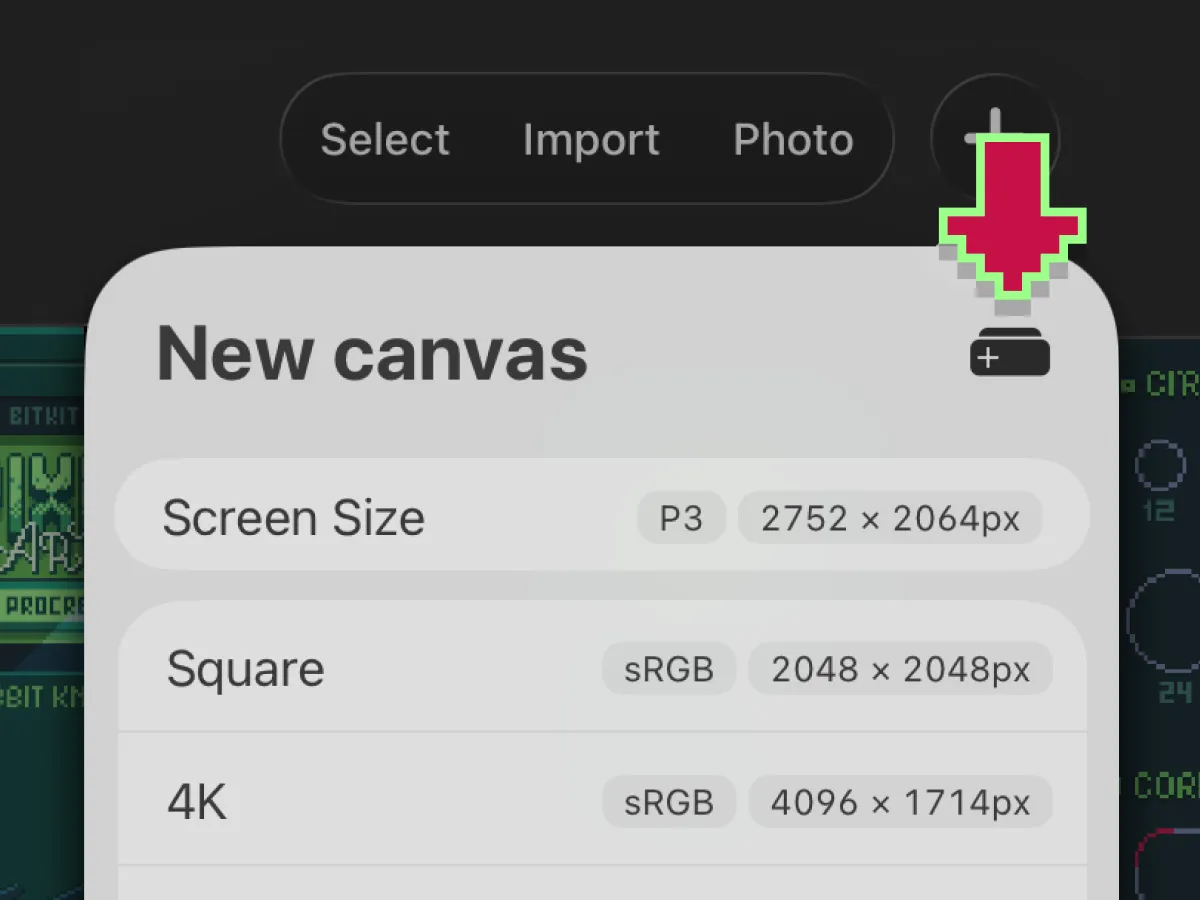
Set the dimensions
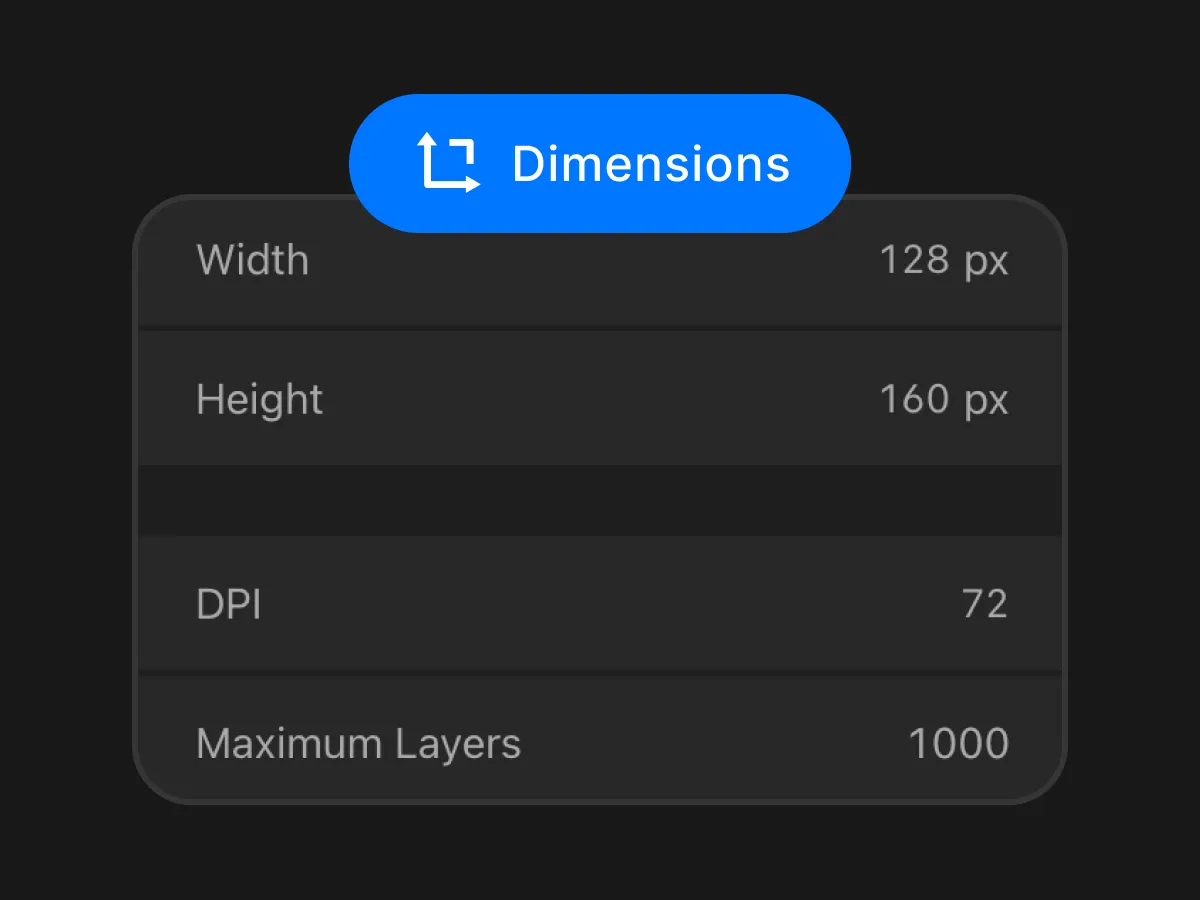
Change the canvas’ width and height to a relatively small size.
If it’s your first time doing pixel art, I recommend a canvas size of a 16px, 32px or 64px square or 126×160 px for social media.
Select color profile
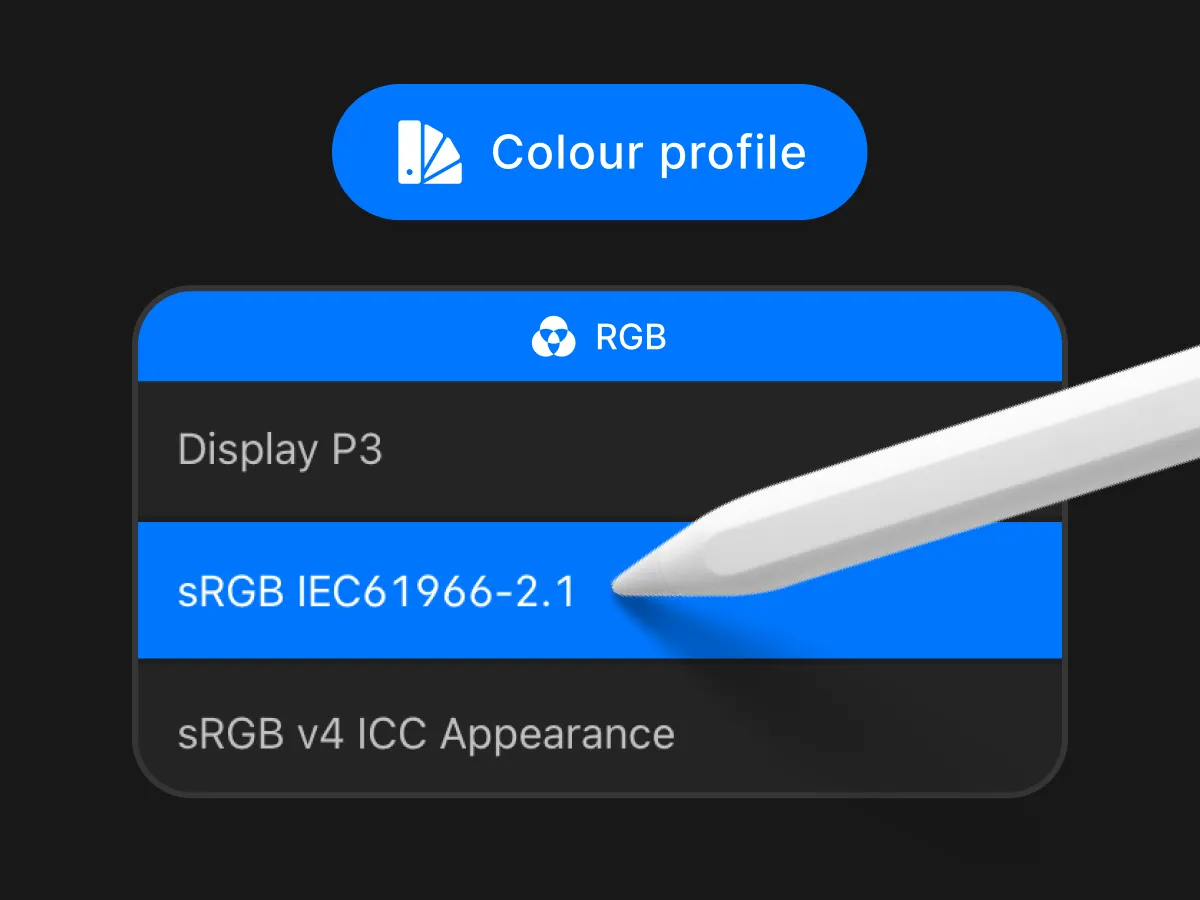
Make sure to use RGB colors to make your colors pop! 🌈
Drawing guides 📐
Activate drawing guides
As mentioned above, when using a 1x1px brush, the pixels stay on the grid by default. You can make your work even easier by making the guides visible. This also makes it much easier to draw symmetrical shapes.
Here’s how you set them up:
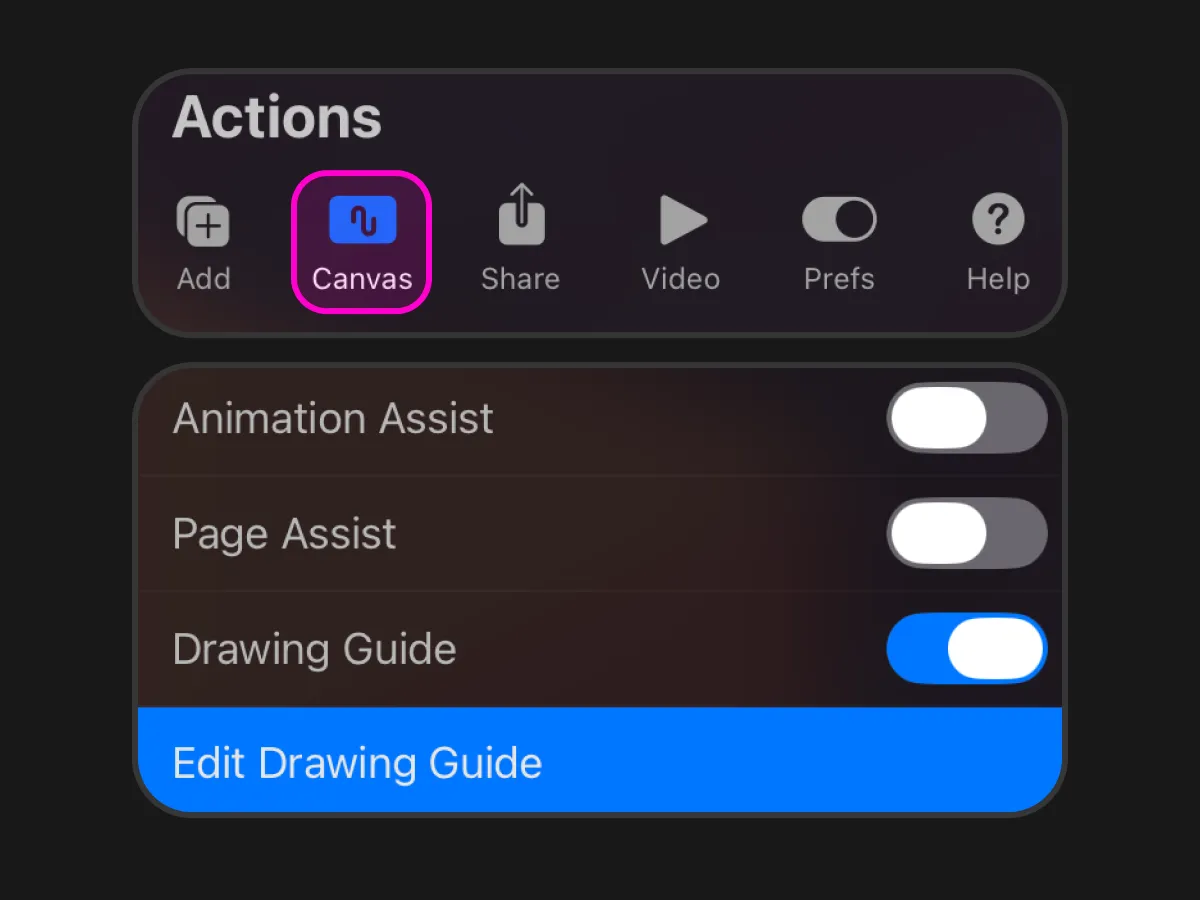
- Tab on “Edit Drawing Guide” to get into the settings
- In the Actions > Canvas menu, activate “Drawing Guide”
Optimal settings for pixel art
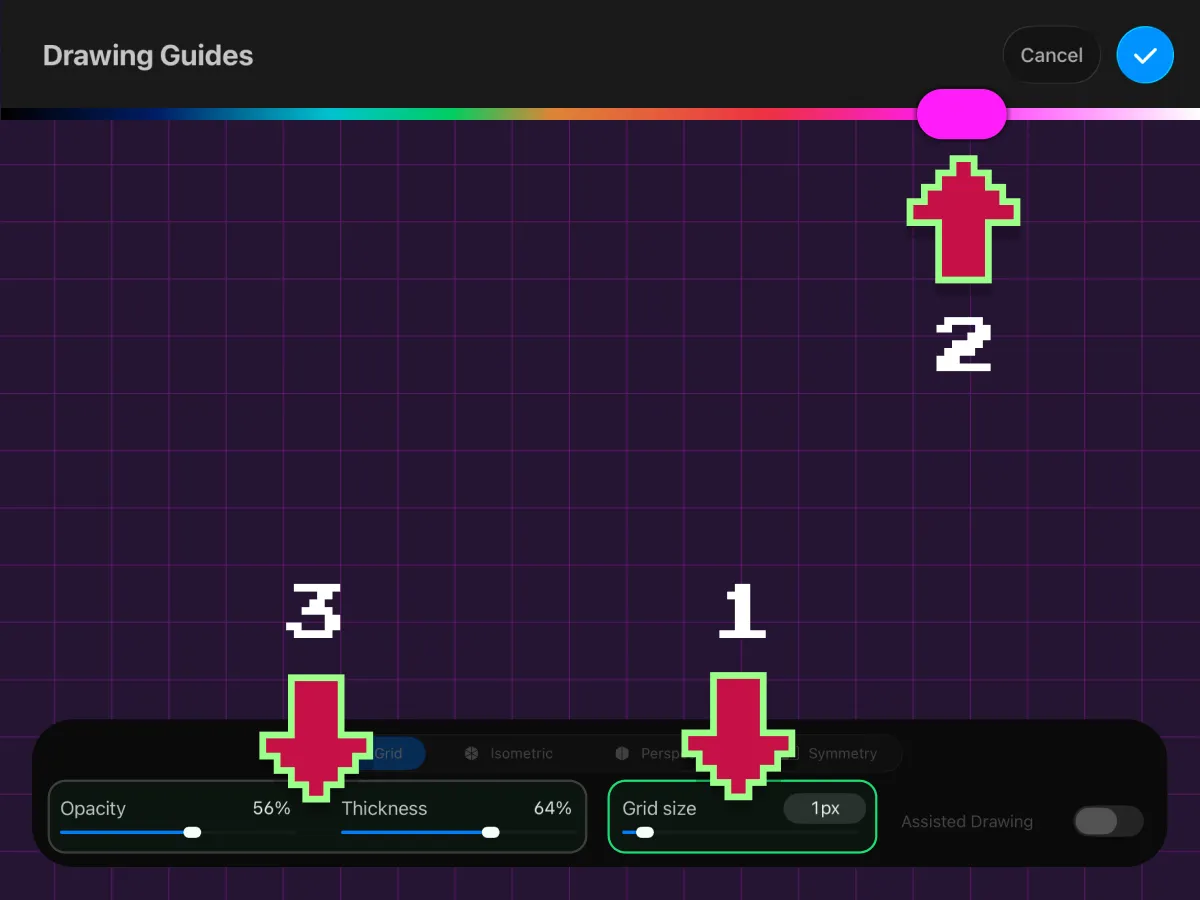
Set “Grid size” to 1px (1), the rest is optional.
Depending on your artwork, you can adjust the guide color (2) as well as the transparency and thickness of the guide’s strokes (3).
Bonus: Isometric guide
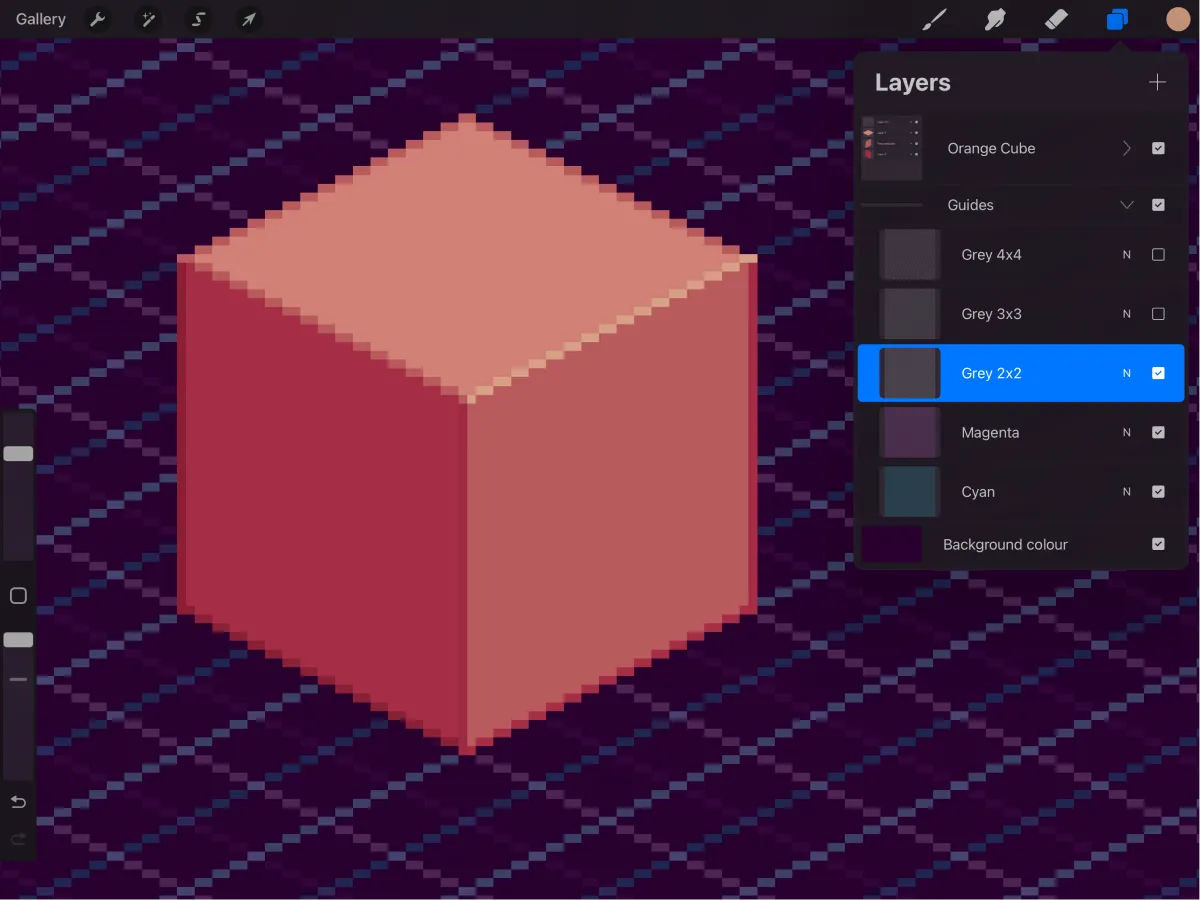
If you want to create 3D shapes, isometric guide lines are super handy. They help you maintain the correct perspective.
Procreate does have Isometric guides included but these don’t work for pixel art unfortunately.
Therefore you can grab mine below and create them yourself:
- Draw a diagonal line from the left to the right size of your canvas
- Copy, paste and move your lines, so they keep the same spacing
- Duplicate your layer or folder with all lines and flip it horizontally
- That’s it! You can add more spacing variations if you like I did →
I need more space! 🚀
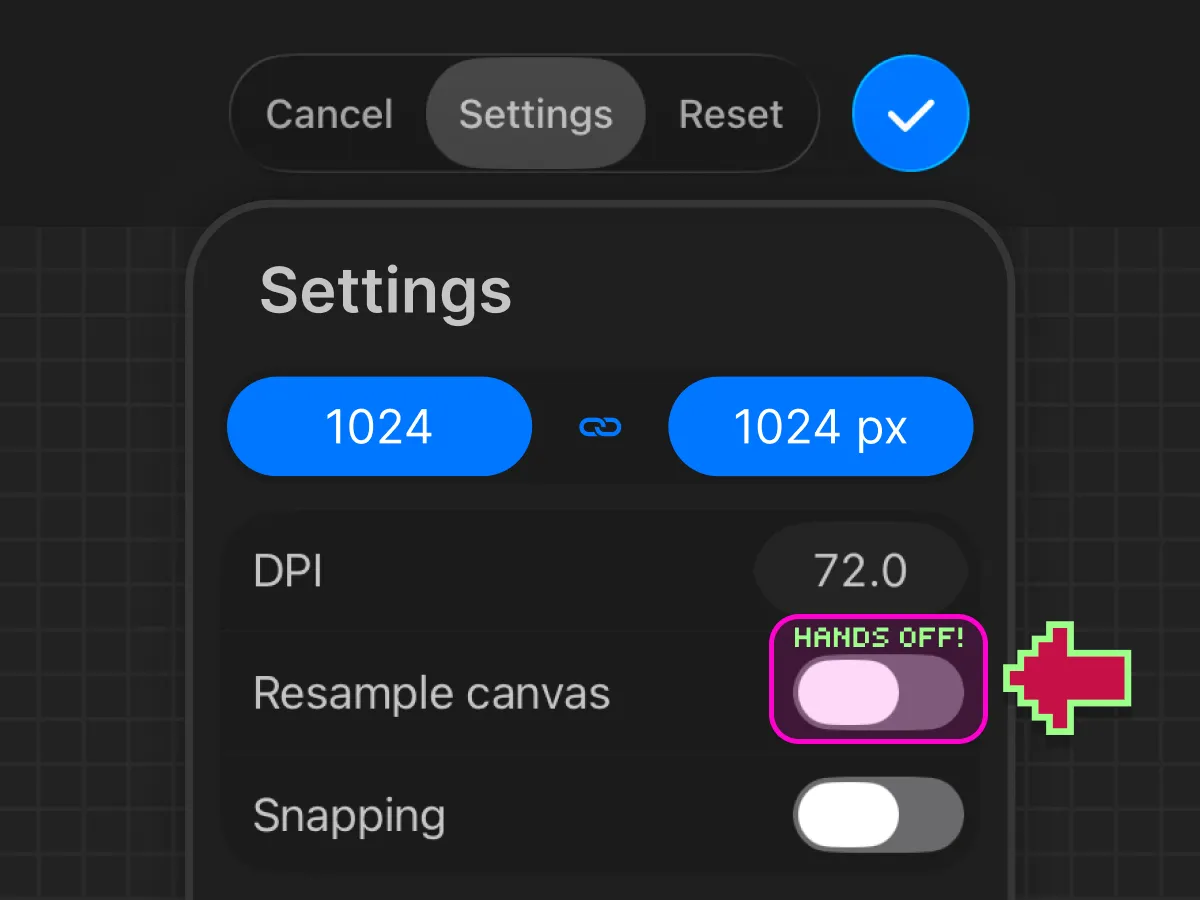
If you happen to run out of space while you’re pixeling, you can adjust the canvas size at any time.
Go to the “Actions > Canvas” menu and open the canvas settings by clicking the “Crop & Resize” button.
If you want to keep your current canvas proportions, make sure to tap on the lock between before changing any value.
🚨 Important: Deactivate “Resample canvas”! Else your whole artwork will be scaled but not in a way that works with pixel art unfortunately.
Free pixel art mini-kit 👾
What’s inside
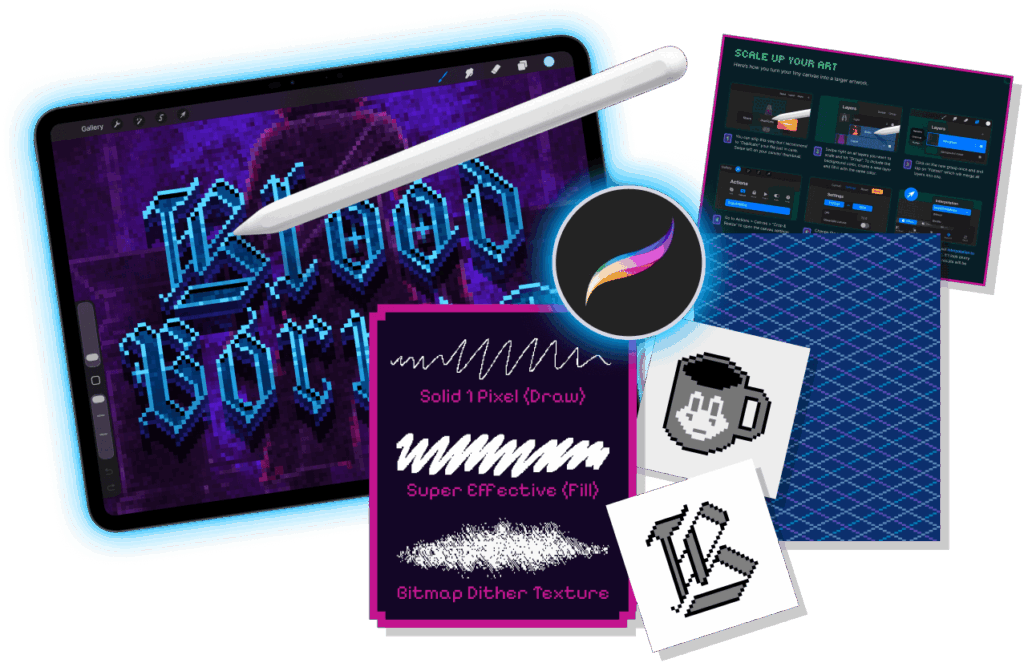
- 3 Brushes files (draw, fill, dither texture)
- 3 Templates (2 designs & isometric guide)
- 1 Instruction PDF (Installing & Scaling)