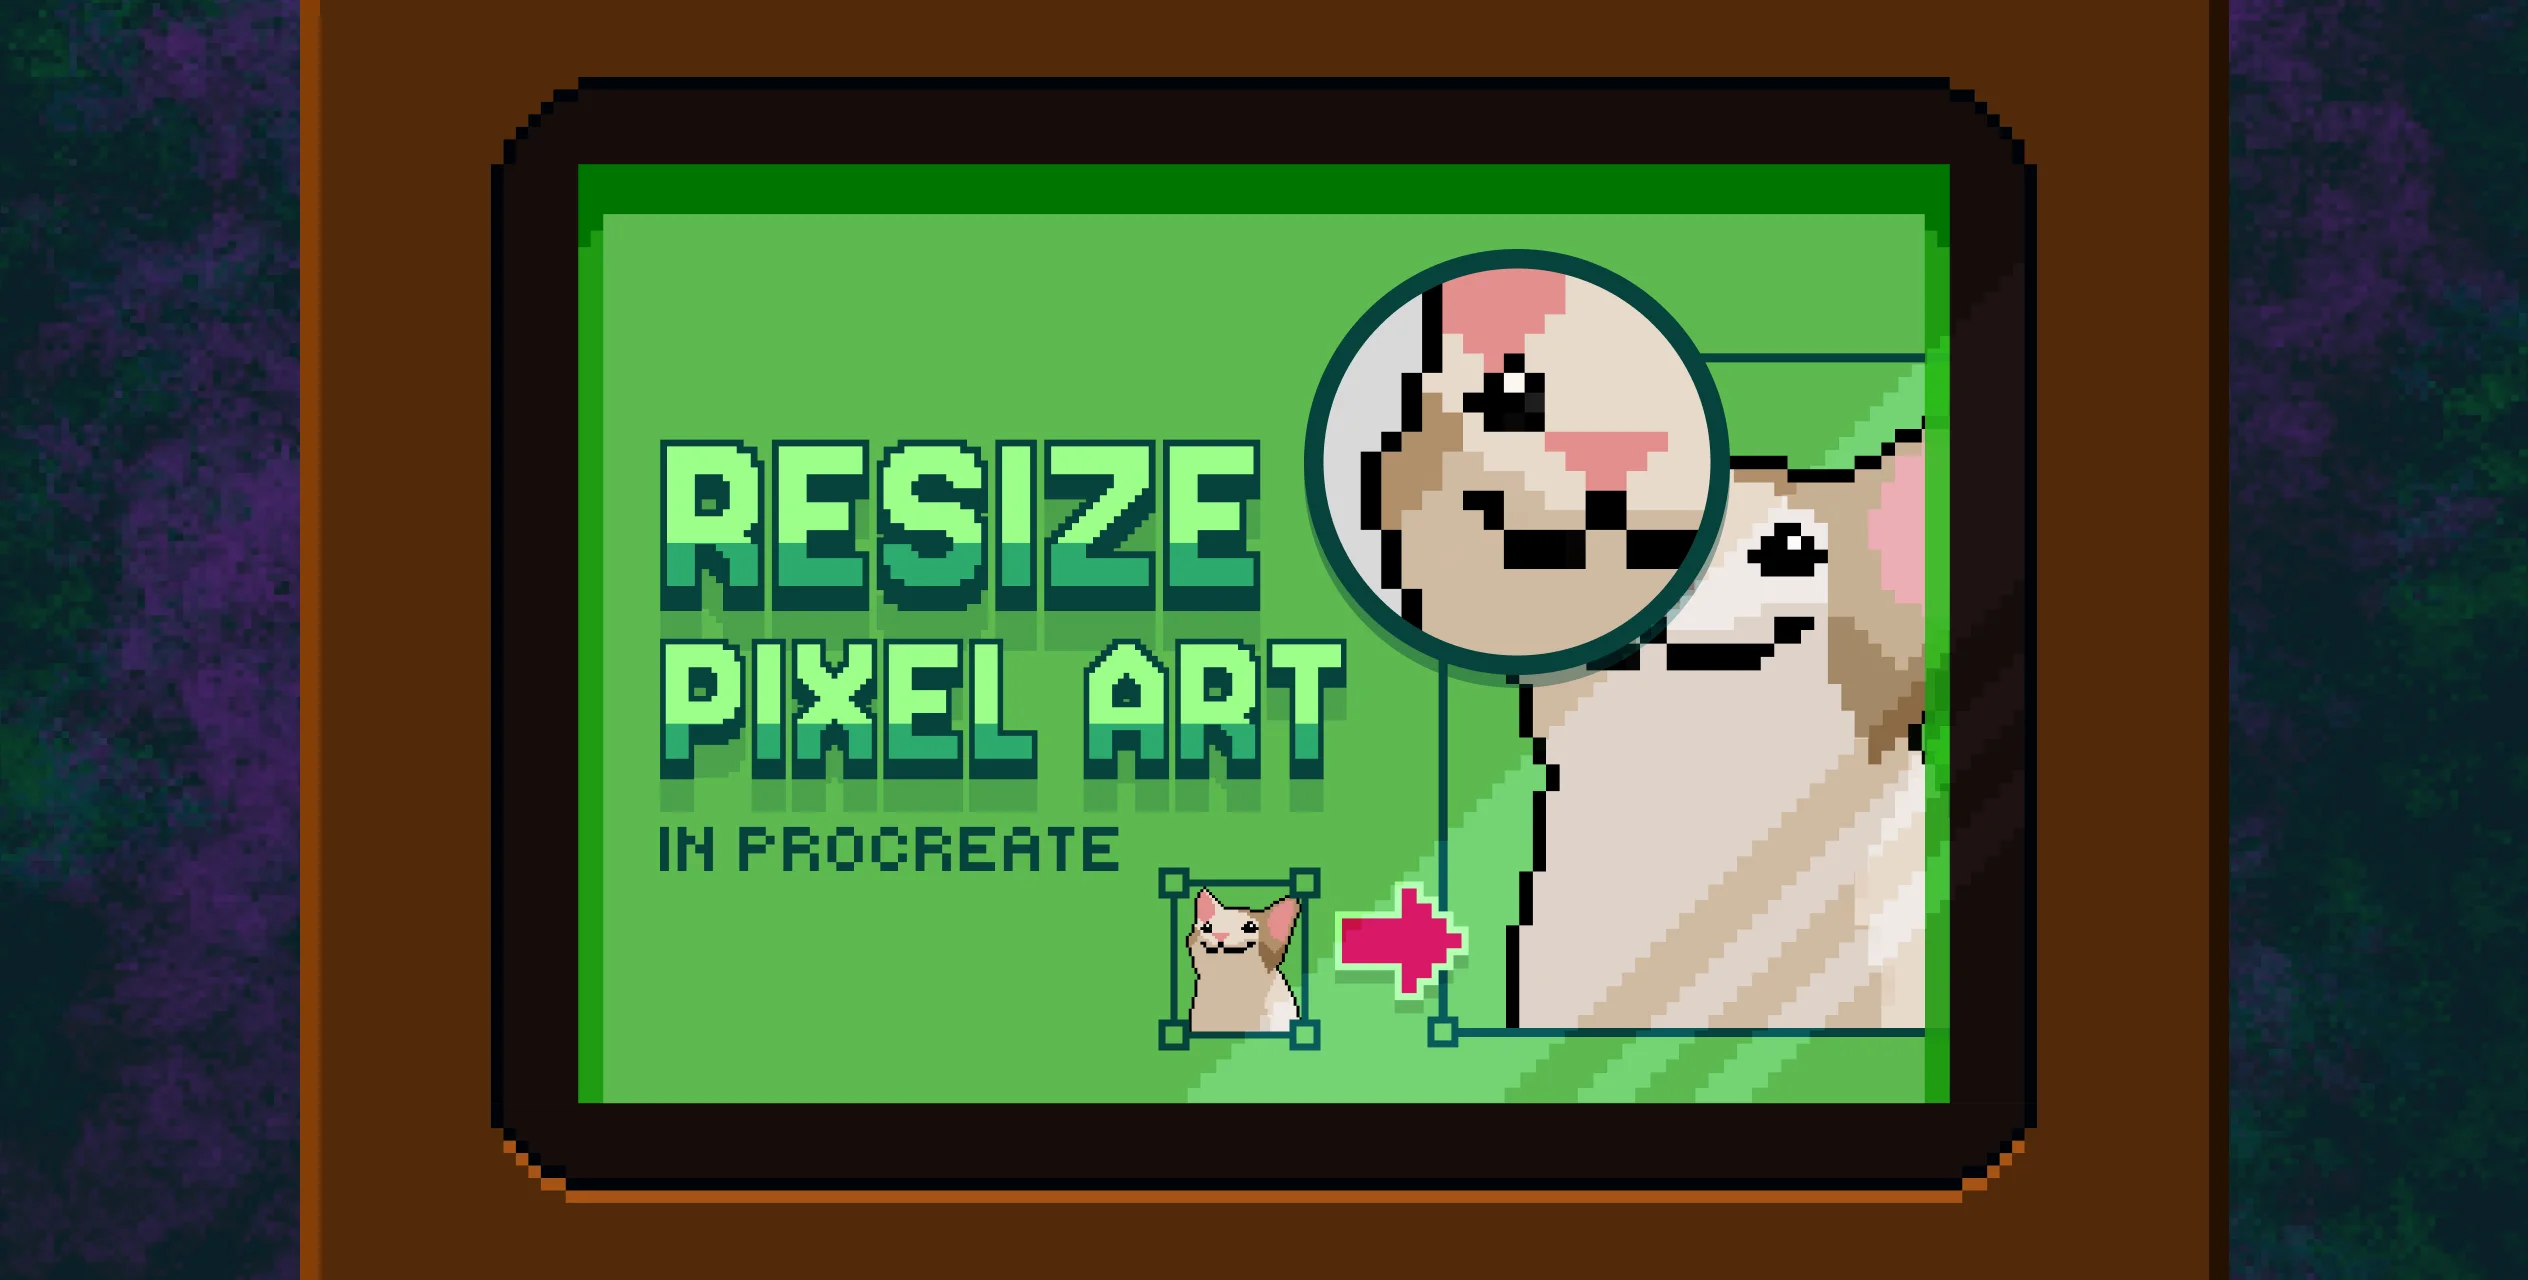
Resize pixel art without breaking in Procreate
After discussing how to make a brush and set up a canvas for pixel art, the biggest question is how to scale your art.
If you tried resizing pixel art in Procreate before, you were probably left with a blurry result if you didn’t change your interpolation settings.
Here’s how you can do that:
Better save than sorry
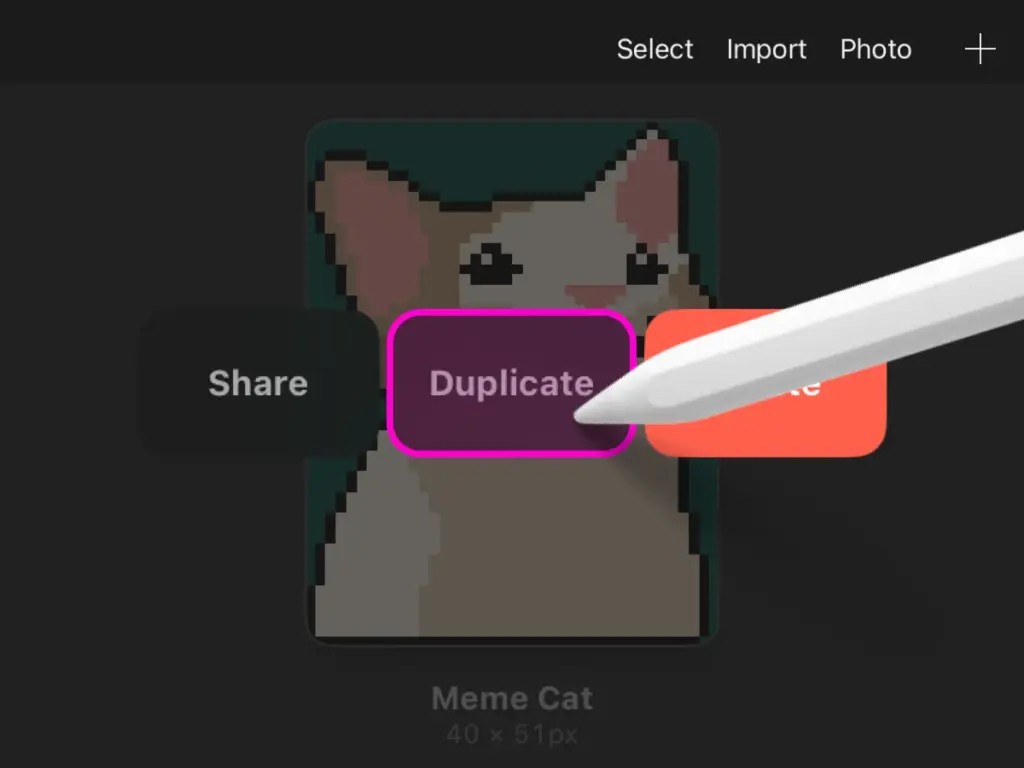
This step isn’t really necessary, but I like to make a “Duplicate” of my canvas so I have a backup, j ust in case.
Simply swipe left on the thumbnail of your canvas. Be careful not to accidentally tap “Delete”. It’s a trap!
1. Select your layers
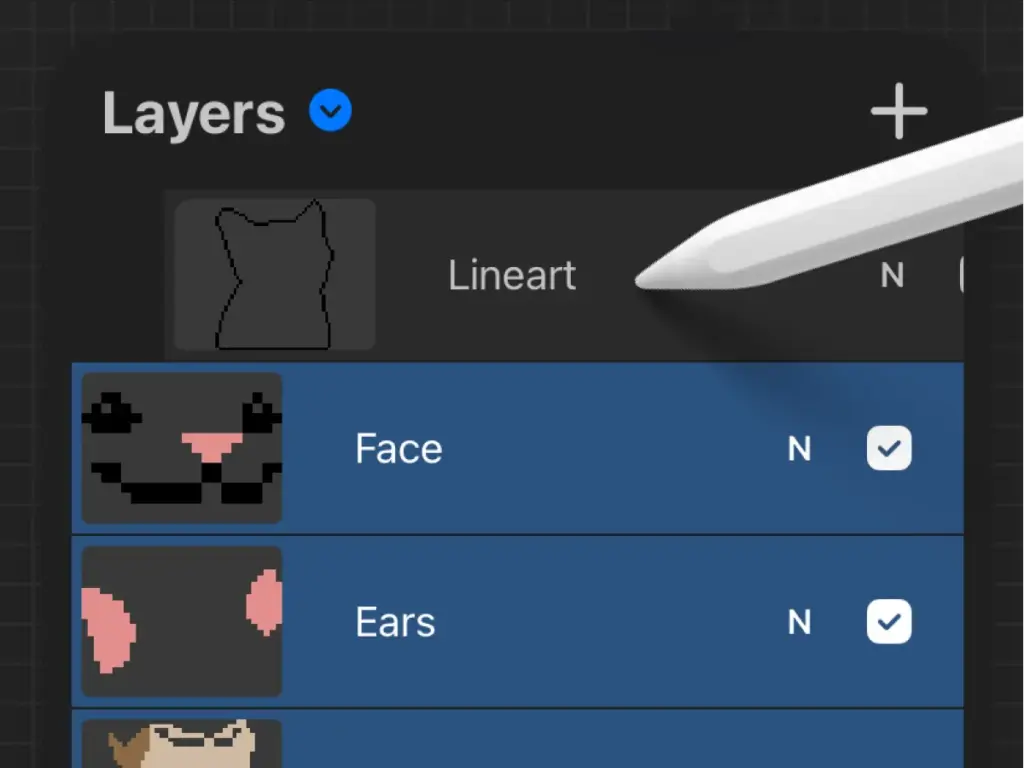
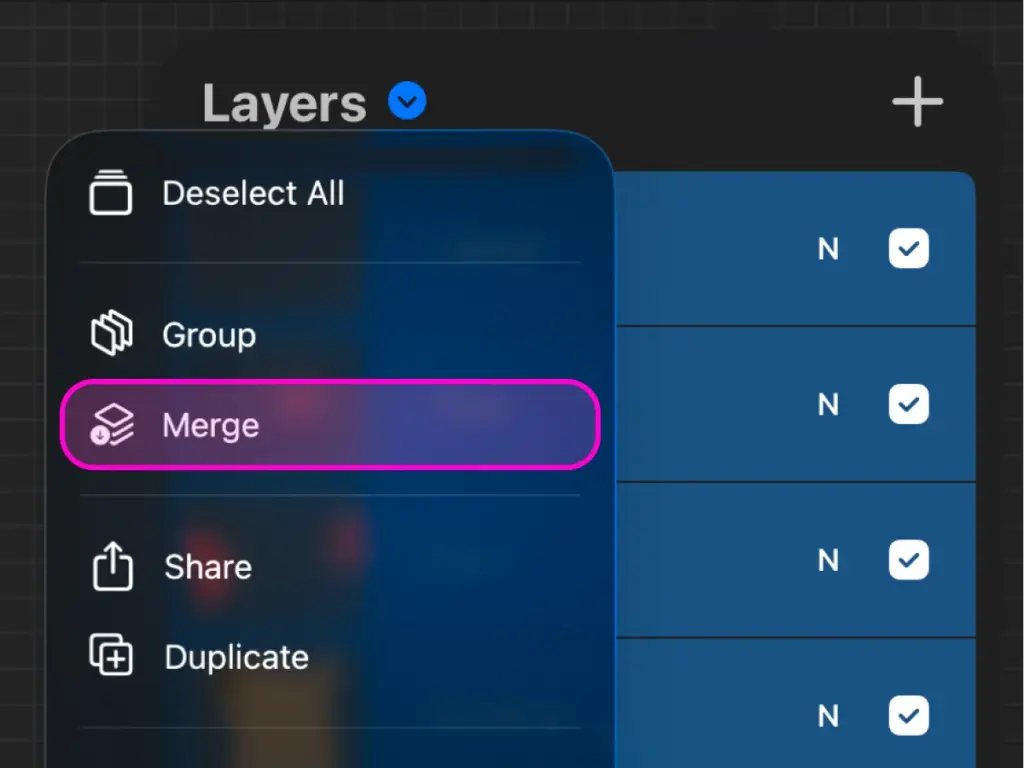
Swipe right on all layers you want to scale and tap on the blue arrow beside the headline “Layers”.
Use “Merge” to reduce all selected layers to a single one.
Troubleshoot
Occasionally when using blending modes, clipping masks and transparency in your project, merging layers can lead to issues. 👉👈
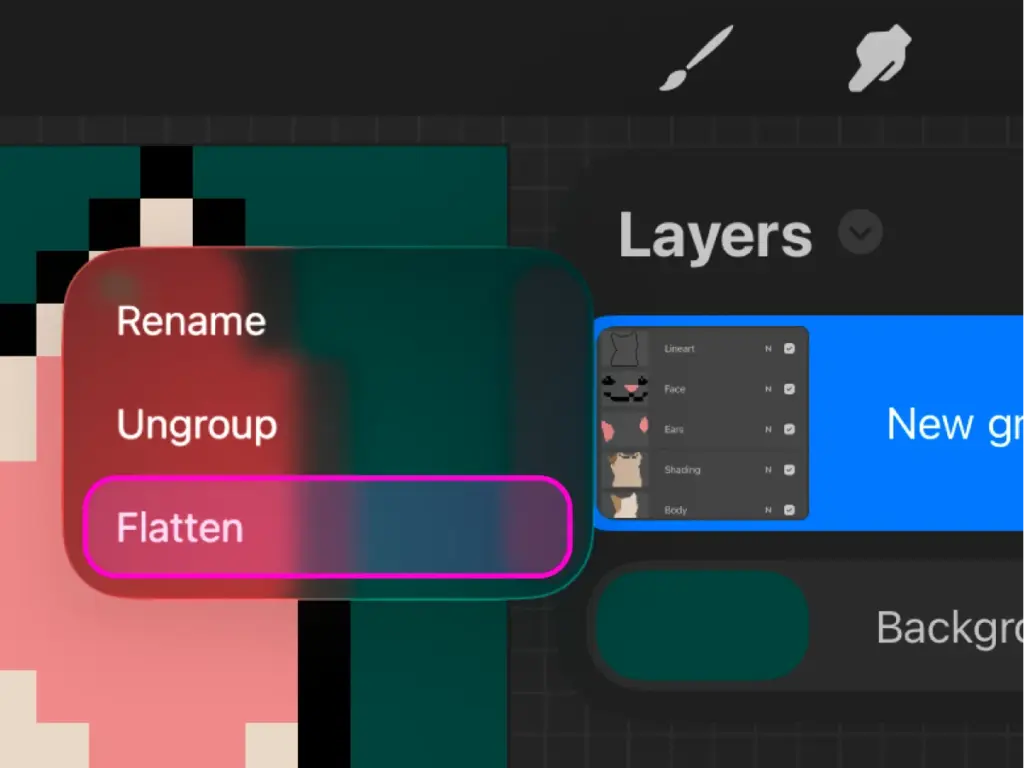
In that case: Undo the last step, select the layers again, but choose “Group” instead of “Merge”.
Then just tap the group’s thumbnail and select “Flatten”.

2. Resize your canvas
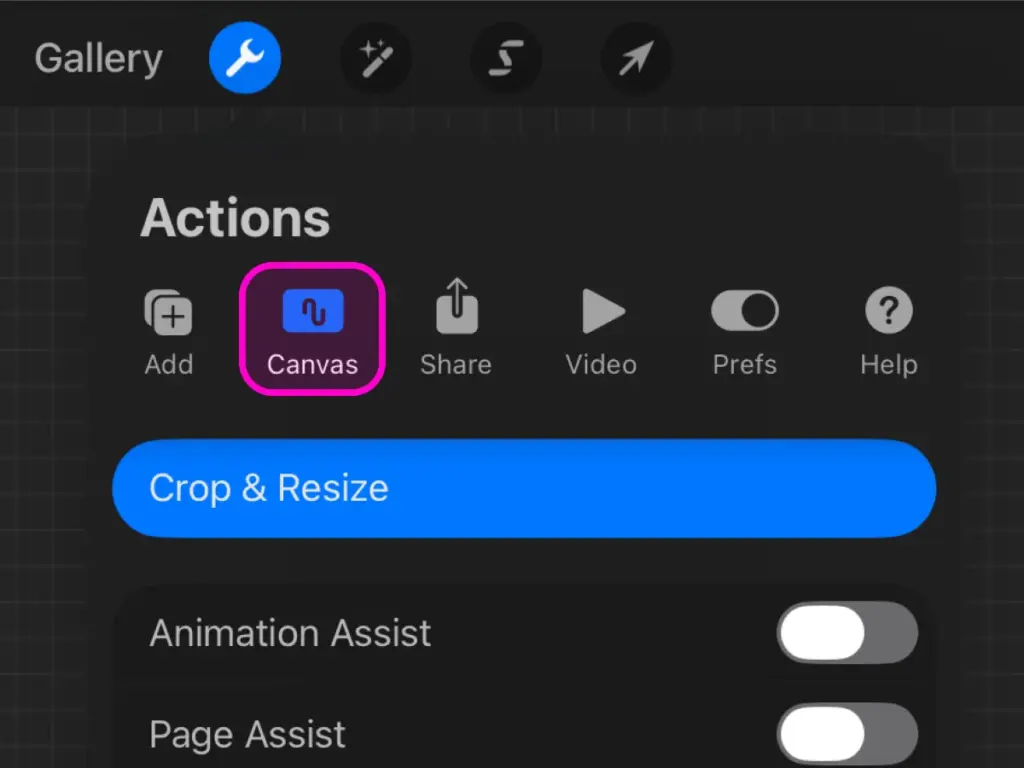
Go to Actions > Canvas > “Crop & Resize” to open the canvas settings.
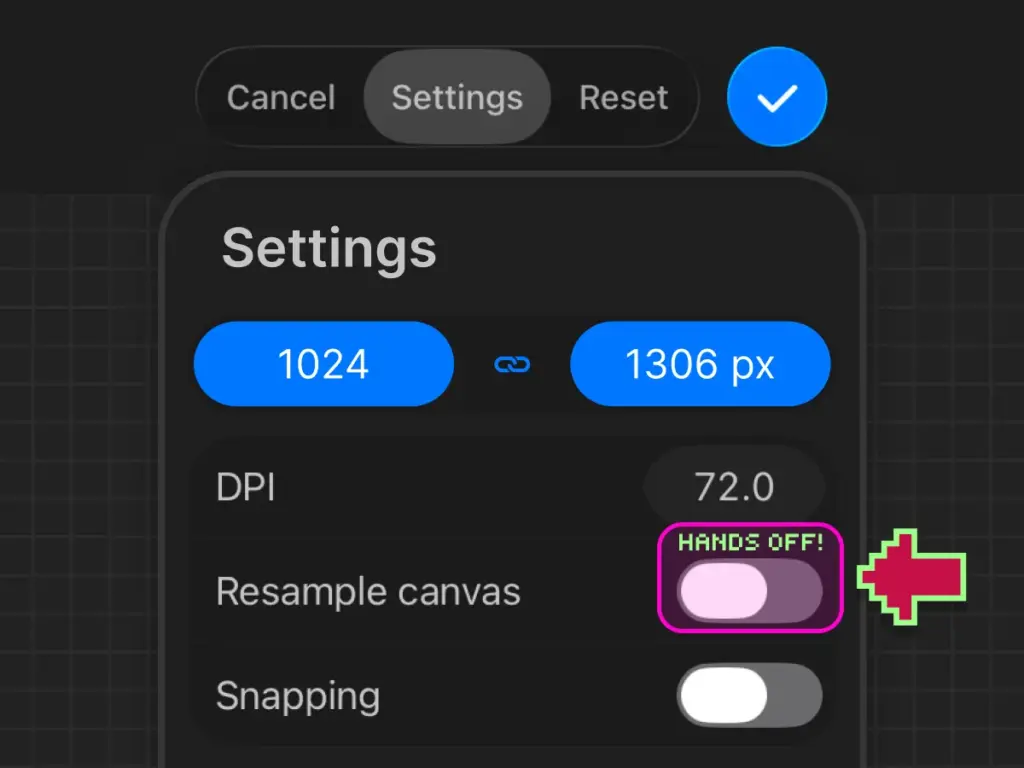
Change the values to your preferred size. If you want to keep the same proportions, hit the chain icon before editing any of the values.
Make sure that “Resample” is turned off. Otherwise, your layer is already scaled but will become a blurry mess.
3. Interpolation ✨
This is where the magic happens:
Under transform, set “Interpolation” to “Nearest Neighbour”.
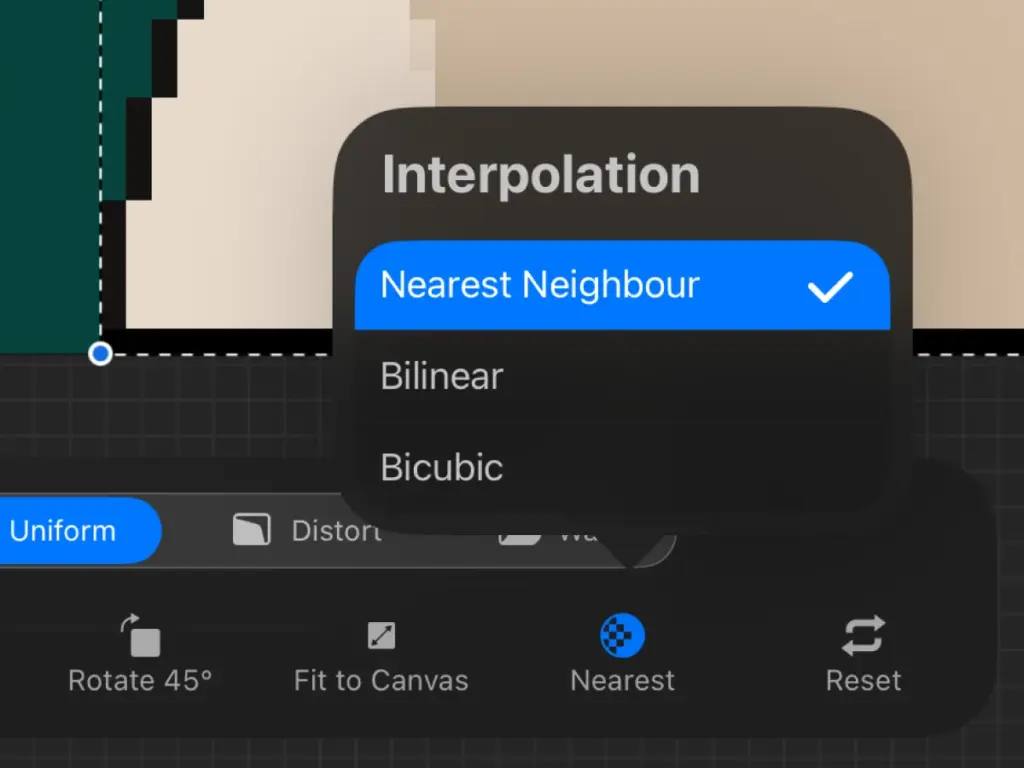
4. Scale your art
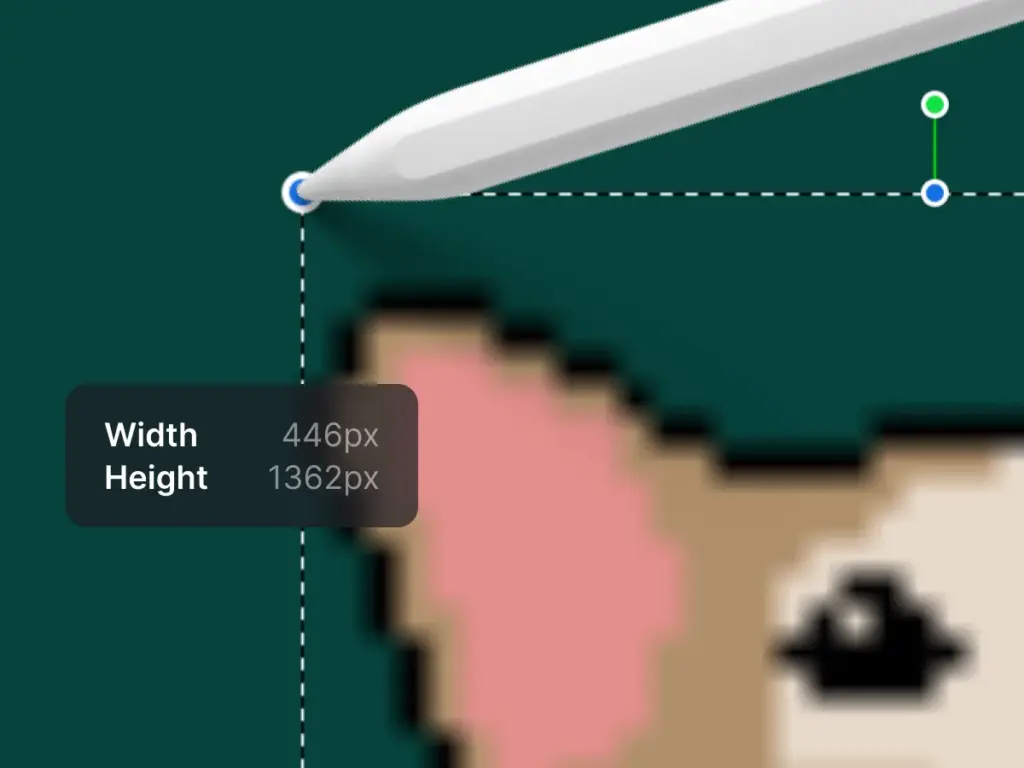
Select an anchor point and start scaling!
It’ll only look blurry during the scaling process but the results will be super crisp once you deselect your art.
ℹ️ Tip: If you used the exact aspect ratio in step 3 (Resize your canvas), you can use the “Fit to Canvas” function as well. Your art will then be scaled automatically to fill the whole canvas.
Export your pixel art ⬇️
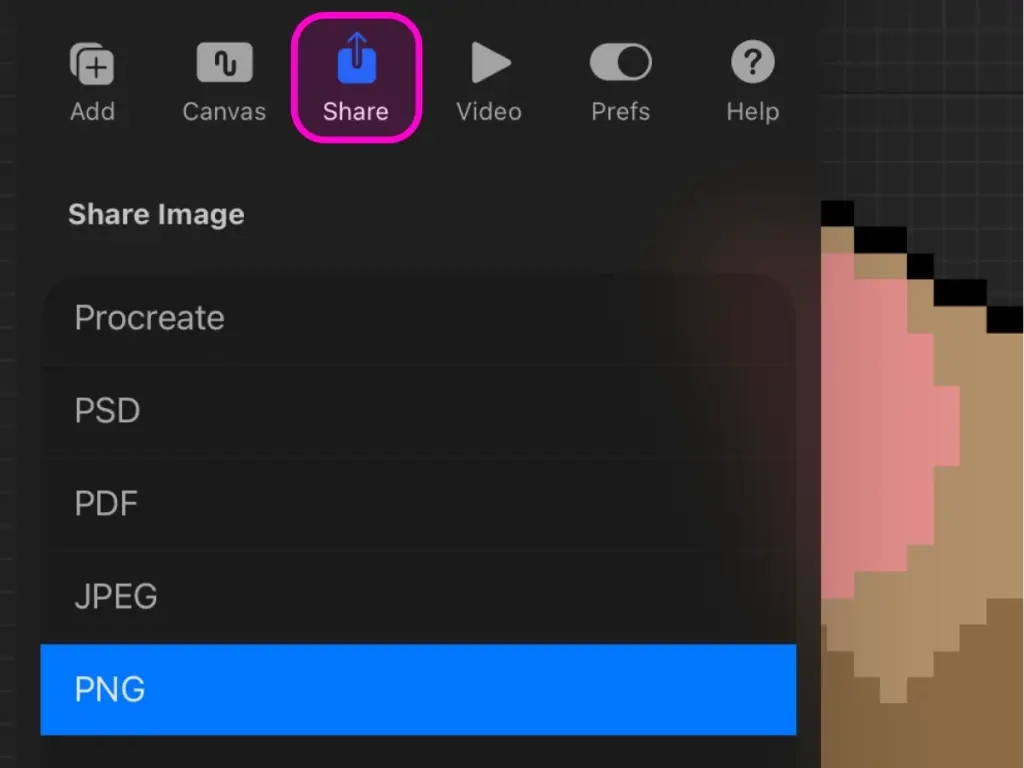
Optimal image format
For pixel art, PNG is the best choice because it helps keep the edges of individual pixels sharp, whereas JPG may smooth or blur them.
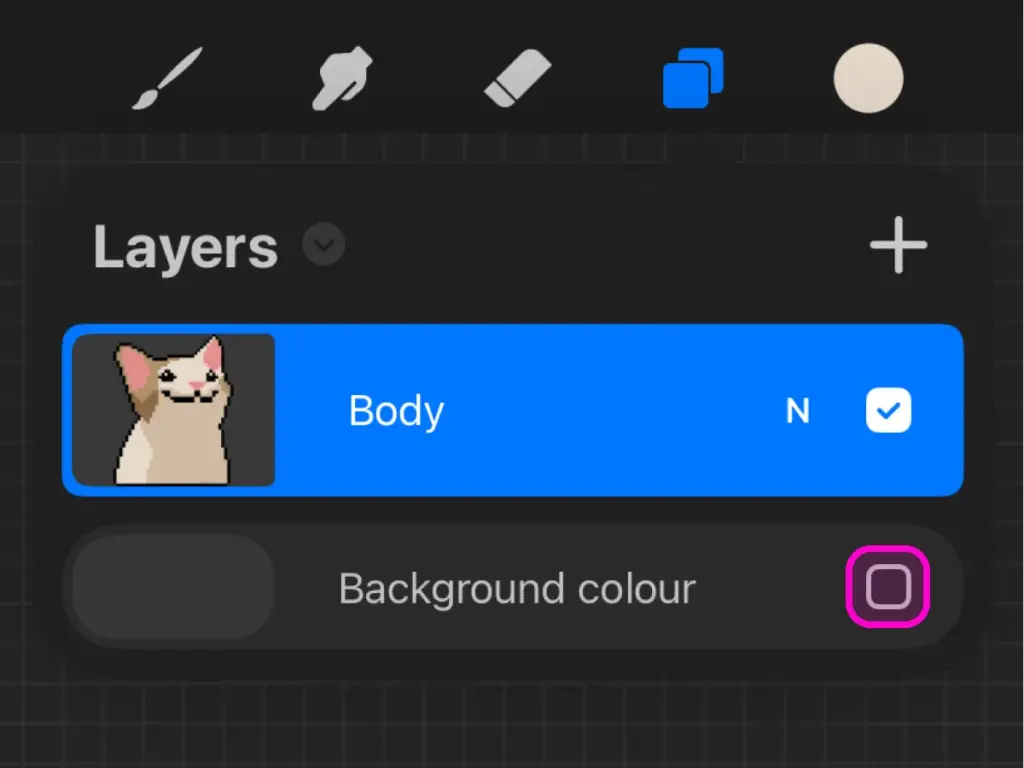
How about transparency?
If you want a transparent background, simply uncheck the “Background Color” layer before exporting.
If you have other layers behind your object, hide those as well.
With transparent graphics, make sure to use PNG. Selecting JPG will automatically set the background to white.
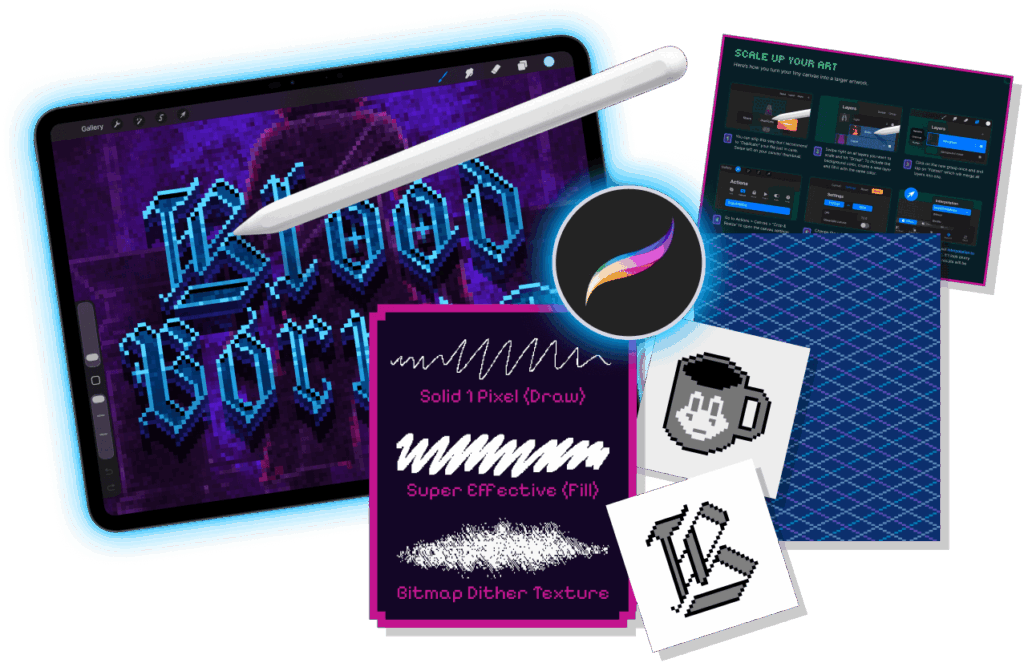
Free pixel art mini-kit 👾
What’s inside
- 3 Brushes files (draw, fill, dither texture)
- 3 Templates (2 designs & isometric guide)
- 1 Instruction PDF (Installing & Scaling)
More pixel art related posts 👾
Resize pixel art without breaking in Procreate
Putting one of the biggest mysteries to rest: How do I actually scale pixel art properly in Procreate without turning it into a pixel mess?
Canvas setup for pixel art in Procreate
What’s a good size when starting with pixel art in Procreate? Here are my go-to settings, I use when creating a new pixel project.
Make a pixel brush for Procreate
If you want to try pixel art in Procreate, all you need is a pixel brush. Don’t panic, if this is your first brush! Here’s how you can do it.